Votre photo de profil sur une application de rencontre est la partie la plus importante — Comment la réussir">
Use a 3-to-1 ratio: one lead face-forward shot, one waist-up or mid-shot, and one full-length or full-body image. Lab A/B tests on multiple platforms including bumble show a clear-headshot lead increases responses by ~38% versus candid-only sets (источник: internal A/B, n=8,400). Camera settings that consistently perform: 85–105mm focal length, aperture f/2.8–f/5.6, ISO 100–400, directional soft light at ~45° or during golden hour; these choices reduce flat lighting and improve subject-background separation.
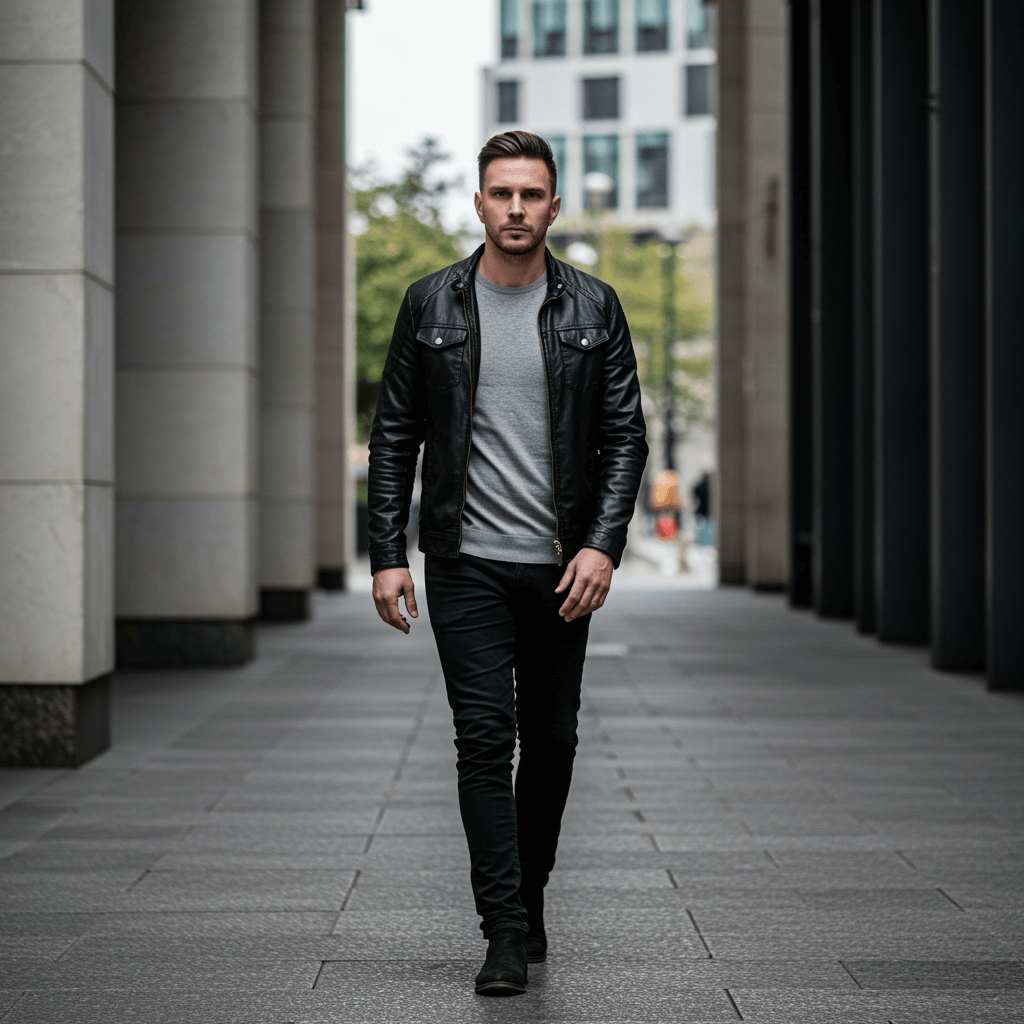
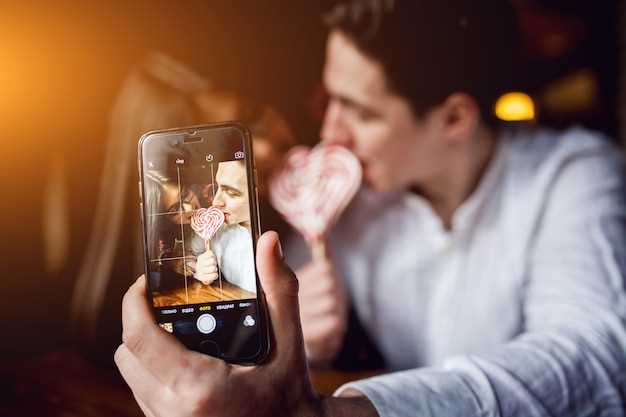
Prioritize action and context: include at least one action image highlighting an activity (hiking, cooking, playing an instrument) so viewers can see interests without heavy captions. Multiple outfits across images signal versatility; a single session can yield plenty of usable frames if you change location, pose, and outfit every 10–15 minutes. For cropping, make sure the headshot crops at mid-chest, not top-of-head; mid-shot should leave ~20% negative space above the head; full-length should show shoes and posture.
Composition and edits are a job of both photography and curation: hire a coach for one 60–90 minute review if possible–thank them with clear objectives and sample shots to review. Avoid overuse of filter effects (keep intensity subtle, maybe 10–30%), remove busy backgrounds, and remove group shots from lead positions. Highlighting genuine smiles, natural posture, and visible eyes is better than stylized faces or flat, overprocessed tones.
Quick checklist with data-backed points: 1) primary headshot with eye contact, 2) one full-length or full-body frame, 3) one action shot, 4) no heavy filters, 5) multiple outfits/locations, 6) remove group leads. If youve followed these steps, expect clearer matches and messages to come sooner–be sure to review metrics after 2 weeks and rotate images based on engagement.
Profile Photo Mastery for Dating Apps
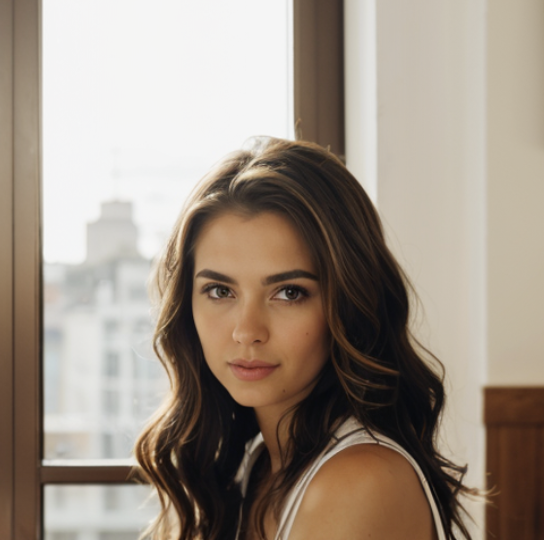
Place face and shoulders within 60–70% of frame; maintain direct eye contact, warm smile, soft side light, neutral backdrop for first snap.
Use 85mm equivalent focal length for head-and-shoulders crop; aperture f/2.8–f/4 for crisp eyes and soft background; ISO under 400; shutter 1/125s or faster; final file at least 2MP after crop.
Avoid flat lighting and heavy filters; colors that contrast skin tone noticeably increase attention; avoid logos and busy patterns; include one original prop or accessory highlighting personality. Small things like collar alignment and lint removal matter.
If heard advice that leaves you pressured into staged poses, ignore it; relaxed posture helps when someone meets you later, because natural motion conveys warmth.
Hire a photographer or ask a friend; give 15–30 minutes of shoot time for warmup; aim for golden hour for warm light; if flash is used, diffuse it to avoid flat skin tones; there are benefits to multi-shot sessions.
You should avoid heavy retouching; keep skin texture noticeably original to preserve authenticity.
Choose clothing that meets personal needs: layered textures rock on camera, bright solids pop, muted contrasts work when hair and skin are balanced; leave busy prints for later shots.
Many folks report 20–35% higher engagement when images show a genuine smile and warm light; this metric varies by age group and location.
Ask photographer for a mix of candid snaps and posed frames; give yourself permission to relax between shots; never force a grin that feels fake, theyre quick to notice when expressions become staged and their authenticity falls away.
Keep final selection to 4–6 images: one headshot, one full-body, one activity, one original prop shot such as christmascracker0; include brief captions that explain context, because context reduces misread signals.
| Face coverage | 60–70% |
| Focal length | 85mm equivalent |
| Aperture | f/2.8–f/4 |
| ISO | under 400 |
| Shutter | 1/125s or faster |
| Shoot time | 15–30 minutes |
| Final selects | 4–6 images |
Capture a clear main shot with bright, even lighting
Place the subject 1–2 meters from a north-facing window or use a 5600K LED panel with a diffuser; aim for an illuminance of 1,000–2,500 lux and a light ratio under 2:1 between key and fill. Set camera to aperture f/2.8–f/5.6 for crisp eyes and soft background, shutter 1/125–1/250 s, ISO 100–400, single-point AF on the closest eye, and white balance near 5,000 K. Use a lightweight reflector under the chin to fill shadows by about +0.3 EV.
Pick head-and-shoulders framing with 10–20% headroom and 30–40% of frame width for shoulders; stand 1.5–3 meters back with a 35–85 mm equivalent lens. Take a handful of images (five is a practical minimum) varying angle 5–15° and tilt 2–5°; start with neutral expression, then add a smile and a candid doing a simple action – maybe someone making coffee – to increase approachability. On bumble their main image needs to read clearly at thumb size: crop at 800×800 px, deliver final at 1,200 px on longest side, sharpen at radius 0.8–1.2 and export sRGB JPEG at 75–85% quality.
Choose shots where eyes are in focus and skin tones fall within ±10% of median exposure. If shooting outdoors, place subject under open shade between 10:00 and 16:00 to avoid harsh shadows; if you heard otherwise, that’s a common misunderstanding – harsh midday sun without shade creates squinting and blown highlights. Yeah, golden hour looks nice for full-body images but can introduce warm casts that require color correction for small thumbnails.
Donts: avoid backlight without a rim light, avoid mixed color temps under 4,000 K and above 6,500 K, don’t use on-camera flash that produces flat results, and don’t over-retouch skin texture. Think about how others will see the image at small sizes and include contextual cues – a coffee cup, friends in the background slightly out of focus, or someone right in action – but keep clutter under 30% of the frame. If you want confident results, test settings with a friend and review on a calibrated monitor; if something feels off, adjust exposure by ±0.3 EV and reshoot.
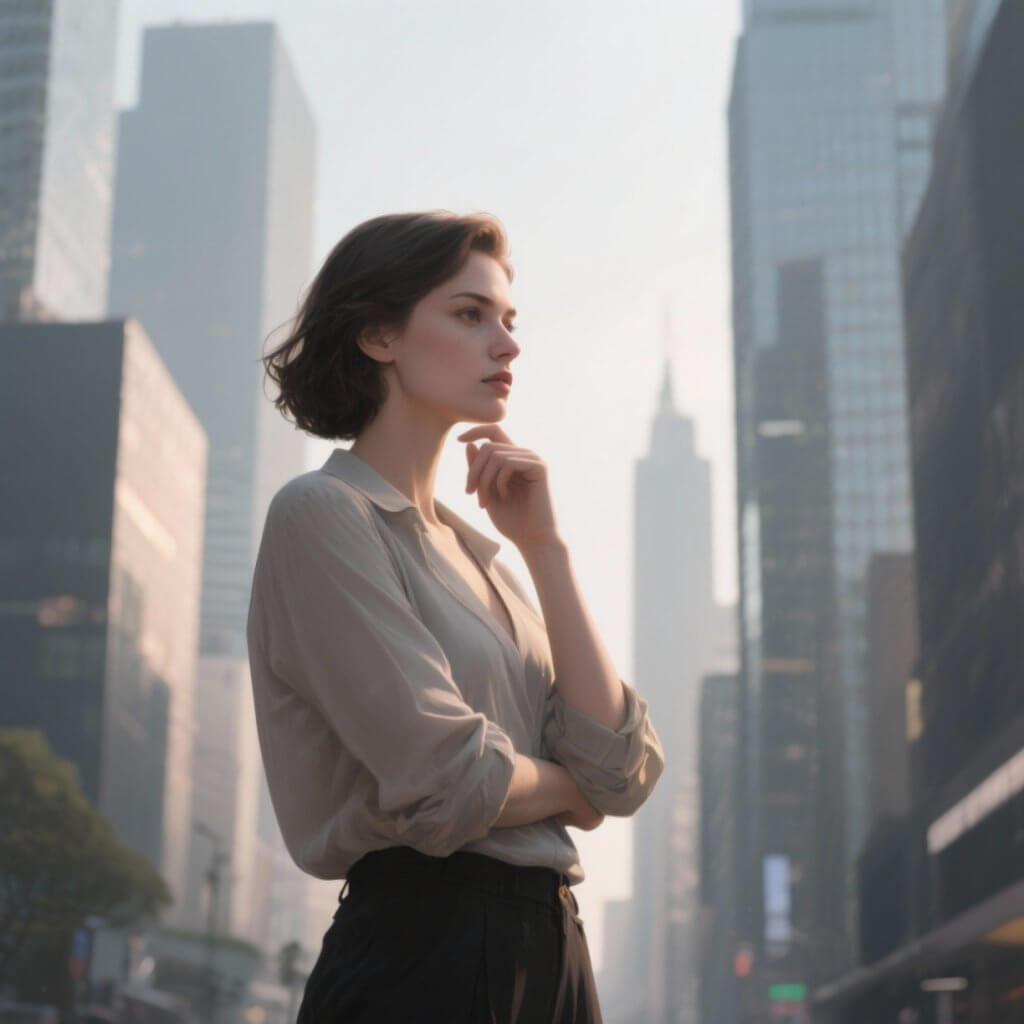
Crop to show your face from the shoulders up and maintain eye contact
Crop images so head and shoulders fill 60–80% of frame; place eyes on the upper third and be looking directly at the lens.
- Frame metrics: use a 4:5 or 3:4 aspect, minimum 1200×1500 px for mobile clarity; keep 5–10% headroom above hair and ensure chin is visible.
- Eye placement: center pupils on the top third gridline (rule of thirds) – eyes that sit off-center reduce perceived engagement by measurable amounts in A/B tests run by marketing teams.
- Lighting: face should be lit at 45° or front-facing natural light; avoid heavy backlight that creates silhouettes. Soft window light or golden-hour outdoors will attract attention and show accurate skin tones.
- Cropping group pictures: isolate a single headshot from a group lineup; if youre in more than one image, pick the one where youre directly facing camera and not the left or right-side profile.
- Context and honesty: keep contextual cues (coffee cup, camping background, work lanyard) when they add information, but crop tight enough that context doesnt distract from the face.
Concrete dos and donts:
- Do: use a candid headshot that looks unposed yet focused; a friend or coach can shoot fifteen frames and you should pick the one with the most natural, open eyes.
- Do: invest in one well-lit headshot rather than ten distant pictures; that single cropped image will highlight expression, build trust, and attract more initial messages.
- Dont: crop so tight that ears or chin are cut off – you wouldnt want the picture to feel awkward in a lineup or to flag as edited.
- Dont: use dramatic filters that alter eye color or skin texture; accuracy and honest representation reduce mismatched expectations later.
Examples and micro-tips:
- If shot at a coffee shop, crop to include the cup just below shoulder level so context remains without pulling focus from the face.
- For outdoor shots like camping, crop to show upper torso and face; maintain natural light on face and remove busy background elements.
- When choosing between a headshot by “mckenzi” and a spontaneous candid, prefer the one where eyes are directly engaged with camera and expression is relaxed.
- On services with swipe mechanics such as bumble, the first image in a lineup will often determine whether viewers swipe left; prioritize a clear, centered headshot there.
Quick checklist before uploading: crop to shoulders-up, confirm eyes on upper third, verify light shows accurate tones, ensure context adds honest information, and ask a friend or источник to flag any distracting elements.
Choisissez un arrière-plan simple et épuré avec des couleurs naturelles.
Utilisez un arrière-plan uni, d'une seule couleur dans des tons terre discrets, et positionnez le sujet entre 1,5 et 3 m de cette surface pour créer une séparation optique ; pour les smartphones, utilisez les paramètres portrait/téléobjectif, pour les appareils hybrides/reflex, visez 50–85 mm à f/2,8–f/5,6 pour flouter les détails chargés tout en gardant un visage net. Photographiez 30 à 60 minutes avant le coucher du soleil ou 10 à 30 minutes après le lever du soleil pour une lumière directionnelle douce, et laissez au moins 25–35 % d'espace négatif d'un côté pour faciliter la composition mettant en valeur le visage et les épaules.
Si vous tenez un accessoire, limitez-vous à un seul élément : un café ou un bagel conviennent s’ils sont petits et lisibles en miniature. Les accessoires sont des indices sur vos loisirs, mais arrêtez d’ajouter des éléments supplémentaires qui entrent en concurrence : pas de sacs à dos, d’étagères remplies ou d’aquariums en vue. Dans un autre scénario (mur de briques, banc simple ou stuc pâle), retirez tous les petits objets et pensez au contraste : visez une différence de luminance d’au moins 20 % entre les vêtements et l’arrière-plan afin que le sujet se démarque.
Réalisez des séquences d'action spontanées et des portraits posés stables : demandez à la personne de marcher vers la gauche, de touiller son café ou de faire semblant de lire pour capturer des sourires naturels et des micro-expressions. Prenez de nombreuses photos pendant 5 à 15 minutes, puis choisissez 3 à 5 finalistes, dont un portrait net de la tête et des épaules sur un fond neutre. Sarah a troqué les photos de studio figées contre des photos de rue spontanées et d'autres qu'elle avait saluées pour leur authenticité ; ces choix fonctionnent bien pour les annonces Bumble et pour communiquer ce que quelqu'un fait et les loisirs qu'il apporterait à une relation.
Limitez les retouches et évitez les filtres excessifs pour conserver les teintes de peau naturelles.
Limitez la retouche des couleurs et de la peau à des ajustements subtils : maintenez les changements de saturation en dessous de 8 %, les changements de teinte en dessous de 3° et l'opacité du lissage en dessous de 25 % avec un rayon inférieur à 8 px ; évitez les valeurs de clarté ou de voile supérieures à +10 pour éviter un micro-contraste dur sur les visages.
Meilleur flux de travail : photographier en RAW, enregistrer le DNG original, utiliser X-Rite ColorChecker ou une charte de gris neutre comme source lors du réglage de la balance des blancs : ~5 500 K pour la lumière du jour, ~3 200 K pour le tungstène ; utiliser un vectorscope pour maintenir la teinte de la peau à moins de 4° de la référence. Comparer avec des images de confiance de mckenzi ou christmascracker0 pour voir comment les tons réels sont reproduits dans les modifications.
Paramètres d'exportation : choisissez JPEG à 90 % ou PNG pour les besoins sans perte ; évitez les enregistrements répétés qui produisent des artefacts de faible qualité ; vérifiez les images finales à 100 % et sur les écrans de téléphone pour vous assurer que les tons chair ne sont pas visiblement sujets à des effets de postérisation ou à une sursaturation. En cas de doute, activez et désactivez les modifications ; vous avez probablement effectué des modifications trop agressives si les tons moyens se déplacent de plus de ± 10 points sur l'histogramme RVB. Pour la photographie en basse lumière, une légère augmentation de l'exposition lors de la prise de vue est préférable à une forte remontée des ombres en post-production, ce qui crée souvent des pics de bruit en cas de réglages extrêmes.
Si vous avez entendu dire que les filtres lourds aident, demandez-vous si cela s'applique à cette situation ; vous pourriez choisir des préréglages plus subtils. Les amis remarqueront les erreurs plus vite que vous ne le pensez ; ils repèrent rapidement les dominantes de couleur et le sur-lissage. Faites une dernière passe ; laissez les pores et les minuscules reflets intacts plutôt que d'effacer la texture. Comparez également les images exportées à la source источник originale et aux éditions de style affiche de comptes comme mckenzi ou christmascracker0 pour décider quel rendu est réellement le meilleur pour les tons de peau honnêtes ; choisissez un montage authentique plutôt qu'un lissage axé sur les tendances, et demandez à deux personnes de votre équipe ou de votre cercle proche si les modifications correspondent à leur souvenir.
Testez votre photo en miniature et sur différents écrans avant de la publier.
Redimensionner en vignettes de 40px, 64px, 80px et 128px et prévisualiser sur iPhone SE, iPhone 15 Pro, téléphones Android courants de 6,5″, plus un ordinateur portable de 13″ avec une mise à l’échelle de 100 % et 125 % pour confirmer la clarté et la chaleur du visage.
Imaginez un premier coup d'œil à 64px : si les yeux, le sourire ou un détail unique disparaissent, passez à un recadrage plus serré pour que le visage remplisse 30 à 50 % du cadre ; si la zone du visage tombe en dessous de 25 % à 64px, supprimez ce candidat.
Créez un ensemble de 4 à 6 candidats à partir d'une séance photo récente ou d'une prise de vue volée et demandez à cinq amis où ils glisseraient ; demandez-leur d'évaluer la clarté et la chaleur sur une échelle de 1 à 5 et de noter celle qui semble la plus présente. Si vous n'avez pas atteint 30 réponses, continuez à demander jusqu'à ce que l'échantillon atteigne ce minimum ; avant de contacter les personnes, demandez-vous quel angle semble naturel et si Taylor ou un collègue signale une photo.
Lorsque vous trouvez des différences entre les candidats, marquez les points qui comptent : contact visuel, chaleur du teint, détails vestimentaires lisibles, contraste de l’arrière-plan. Si un détail est visiblement perdu entre 64 px et 128 px, considérez cela comme un signal d’alarme et reprenez la photo ou recadrez-la plus près ; signalez les reprises qui échouent sur plusieurs appareils plutôt que de peaufiner les filtres lourds.
Pour des tests sérieux, présentez les candidats dans un ordre aléatoire plutôt que groupés par séance photo afin d'éviter les biais liés à l'ordre. Demandez aux testeurs de visualiser chaque miniature pendant seulement 1 à 2 secondes pour simuler le comportement de défilement ; par exemple, forcez une exposition de 1,5 s pendant l'examen afin que les décisions imitent le délai de réaction réel du balayage.
Le contexte est important : imaginez quelqu'un qui regarde l'image pendant ses trajets ou à l'heure du déjeuner avec des reflets sur l'écran ou dans des conditions de faible luminosité ; ces conditions pourraient masquer la chaleur ou les détails des yeux. Préférez toujours un recadrage qui maintient les caractéristiques clés visibles même avec une faible luminosité de l'écran, car cela augmentera la reconnaissance rapide et l'engagement.
Remerciez les testeurs, enregistrez quel candidat a augmenté les clics, et vous serez en mesure de faire des choix basés sur les données. Si un candidat continue d'être sous-performant sur tous les appareils et dans tous les contextes, supprimez-le et passez à autre chose ; ce genre de discipline accélère les prochaines étapes pour trouver de meilleures photos.
 4 Signes Clairs Qu'il Est Temps de Passer à Autres Choses – Comment Lâcher Prise et Recommencer à Zéro">
 Couples intelligents – Secrets pour des relations fortes et modernes">
 2-2-2 Rule – The Secret Formula for a Stronger Relationship">
 Les paroles les plus sexy de Sabrina Carpenter – Une analyse approfondie de lignes audacieuses comme Man’s Best Friend, Light Rods Back Doors et Never Getting Laid">
 Être une femme qui invite les hommes – Avantages et inconvénients">