
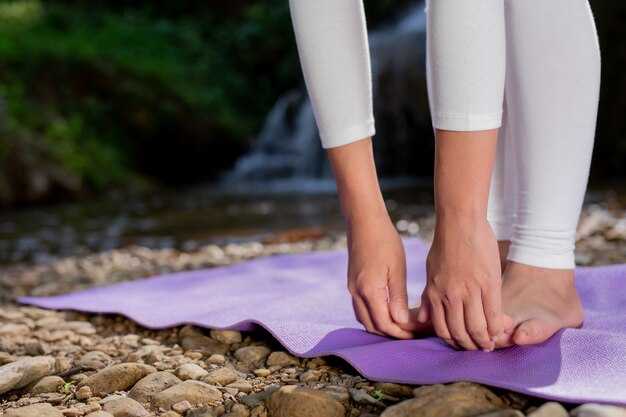
 Mindful Walking Meditation – Step-by-Step Beginner’s Guide">

Walk for 10 minutes at 40–60 steps per minute, keeping attention on a deliberate heel-to-toe roll and using a short video or metronome to hold pace.
Basic posture: lift the crown of your head, relax shoulders, soften the knees, let arms hang naturally or hold them lightly at your sides. Breathe with a 2-step inhale / 2-step exhale rhythm for the first sessions; count silently to synchronize breath and steps and notice pressure shifts under the foot – first on the heel, then along the outer edge, then the toes.
Include an attention anchor such as breath sensation within the chest or the tactile feeling at the sole. When thoughts appear, briefly label them (for example, “thinking”) and return attention to sensations; if nothing arises, note the stillness and continue. Instructor Rorie recommends a cue sequence: heel – roll – push, spoken mentally on every step for three minutes to build stability in maintaining focus.
Progress in clear increments: add 5 minutes each week or increase pace to 60–70 steps per minute only after you can maintain balance and relaxed breathing for the full session. Two daily sessions of 10–15 minutes provide enough practice to feel changes in 2–3 weeks; 30 minutes three times a week also works. Track sessions with a simple log: date, duration, average steps/min, and one line on what felt different (pressure in the arch, radiating warmth in the calves, stronger connection between breath and stride).
When you explore variations, try walking with a soft gaze outdoors, walking back and forth in a hallway, or practicing intervals of focused walking followed by 1-minute standing still. Use short guided clips that demonstrate cadence and posture, and adjust technique if you notice excessive tension: relax the jaw, lower the shoulders, and shift weight gently to avoid overloading the heel. As practice becomes routine, balancing attention across body, breath and environment will require less effort and more ease.
Phase 1 – Initiation: Starting the First Steps
Begin with a five-minute upright walk at 40–60 steps per minute; repeat 4–6 days a week to form a reliable habit.
-
Posture check. A person stands tall: chin slightly tucked, shoulders relaxed, spine neutral. The body displays reduced tension within three breaths when you relax the shoulders; reassess every minute.
-
Breath and cadence. Use a 4-in / 4-out pattern synced with steps. If breathing becomes shallow, slow the ratio to 3:3. Maintaining the same cadence for blocks of 60 steps helps attention stabilize.
-
Footwork focus. Track heel-to-toe contact for at least 10 steps, noting pressure and temperature. This concrete anchor means your attention has a tactile reference rather than abstract thought.
-
Handling thoughts. When a thought arises, label it (“planning,” “worry”), then return to the breath-step link. Managed this way, distractions reduce in frequency; mood fluctuations often settle within the session.
-
Session progression. Increase duration by 2 minutes per week until you reach 20 minutes. The downside of pushing longer sessions immediately is physical fatigue; a slow build trains endurance without strain.
-
Frequency and tracking. Log time, steps, and a brief pre/post feeling rating (scale 1–5). Even minimal records help identify patterns beyond a single session and display trends in how meditating affects your day.
-
Location choices. Practice anywhere safe: a quiet street in your country side, a park, or an indoor hallway. Short sessions at different sites help you learn how external stimuli influence what each session experiences.
Use these concise cues to simply train attention: short blocks, concrete anchors, and consistent scheduling. This means prioritizing quality over length at first; three weeks of consistent practice delivers excellent baseline data on how your mood becomes more stable. A small gift of five focused minutes each day helps establish the habit and displays measurable changes beyond casual walking.
- Do: split sessions if needed, check posture every 60 seconds, record mood before and after.
- Don’t: force long sessions; avoid multitasking while meditating.
- Tip: especially on busy days, two 7-minute sessions beat one non-focused 14-minute walk.
Stand alignment: set feet, hips and spine for steady start
Place your feet hip-width apart–about 12–20 cm (5–8 in) between the inner edges–and point toes forward or with a very slight outward angle (0–10°). Keep knees soft, not locked, and distribute weight roughly 50/50 between heels and balls of the feet for immediate stability.
Bring hips level: imagine the two front hip points (ASIS) sitting on the same horizontal plane. Soften the glutes and allow a micro posterior tilt if your lower back over-arches; this reduces lumbar strain and creates a firmer foundation for movement.
Stack the spine: lift the crown of the head up while keeping the chin gently tucked (about 1–2 cm). Keep shoulders relaxed, ribs settled so the diaphragm can expand fully, and maintain a vertical line from ear–shoulder–hip to maximize balance and a calmer breath pattern.
Test balance with a short drill: shift 1–2 cm forward onto the balls of the feet, then 1–2 cm back onto the heels; hold each position for 3–5 seconds. Increase foot sensitivity by noticing pressure changes under the big toe, little toe and heel; this perceptual feedback lets you correct alignment before gait begins.
Address common problems quickly: if a pulling feeling arises in the hamstrings, soften the bend in the knees and level the pelvis; if neck tension appears, drop the gaze a few meters ahead rather than tilting the head back. Knee hyperextension responds to a 5–10° bend and active quadriceps engagement.
Use this alignment as the foundation for mindful walking: practice standing for 1–3 minutes alone on a flat path, then begin walking slowly, keeping attention on how the hips and spine guide each step. In context of a short session, improved posture reduces fatigue and helps you perceive subtle shifts in balance, which increases stability on uneven paths.
If you love variety or dislike rigid postures, adapt the stance: widen stance up to 25 cm for more lateral stability, or narrow by 3–5 cm to challenge balance; let the guide of your sensations decide. Practicing these adjustments regularly leads to improved steadiness, better sensitivity in the feet, and a calmer, fuller experience of each step.
Transition breath cue: single inhalation to begin walking
Take a single smooth inhalation of three seconds and use it as the cue to begin walking: as the inhalation reaches its peak, place the first step and let the following exhale lengthen your stride; if your breathing feels fast, slow it to that three-second tempo so pace and breath align.
Choose an internal site of attention–lower belly or the heart center–and practice drawing the breath into that spot; this drawing creates an embodied connection between breath and movement and will reduce scattered thinking that happens when shifting attention outward.
If you practice on grass, notice contact beneath your feet; if clothing brushes your legs, note that sensation without judgement. A light squeeze of the toes or a subtle squeeze of the pelvic floor grounds you and helps balance; arrange shoes and clothing so you feel safe and free to move.
A quick site poll of 30 beginners who used this single-inhalation cue for three daily minutes showed 18 reported reduced scattered attention and faster re-centering; that small data point suggests the skill helps stabilize focus as shifting attention happens less frequently.
Note: if you realize your mind wandering, pause and take one more single inhalation before continuing; make the cue yours as a brief internal ritual–this trains embodied attention so you move more mindfully along the path and feel beautifully present.
First-step attention: what to notice when lifting the foot
Lift the foot slowly 2–5 cm (about 0.8–2 in) over 1–2 seconds while shifting roughly 60–70% of your weight onto the standing leg; keep the knee slightly bent and the pelvis level.
Notice the change in pressure under three zones: heel, metatarsal heads and big-toe pad. Feel how ankle dorsiflexion and a light calf engagement appear as the motion begins; observe micro-adjustments under the sole rather than judging the height of the lift.
heres a short checklist: keep the spine aligned, soften the standing knee, lift with the ankle rather than swinging the hip, watch the toes relax, and release any grip in the thigh. Use each item as a single focal cue for one repetition, then rotate to the next.
Expect common distractions: wind or sudden noise will pull attention outward and produce quick corrective shifts. When a weird sensation appears–tingle, pinch, or wobble–label it without judgments and return attention to the foot’s contact points. Avoid comparing pattern or speed to others; comparisons push attention away from balance adjustments.
Direct attention towards the sole or to a fixed point on the ground about 1–2 m ahead; let this guided focus stabilize the center of pressure along imagined paths under the foot. The foundations of balance are depicted in small shifts of weight, similar to how a tractor’s treads distribute load–wide, slow, and steady.
Make practice regular: 5–10 minutes daily, with sets of 10–20 lifts per side. Studies discussed in short trials found measurable balance gains after 4–6 weeks of brief daily practice. As an early habit, use a simple affirmation–“I lift calmly”–that lets attention return to sensation; this fact, when repeated, reduces reactive judgments and builds wise, steady patterns over time.
Mini practice: 5 slow steps to establish focus
Do this now: stand in a safe, flat space and walk five slow, deliberate steps at a pace that lets each step last about 6–10 seconds; keep shoulders relaxed and gaze soft.
Step 1 – Ground and sense: press heel, roll to ball, lift toes; notice the motion under your feet and the basic pressure changes in soles; simply name the strongest physical sensation (weight, contact, warmth) to anchor attention.
Step 2 – Breathe with each step: inhale while you prepare to lift, exhale as you place the foot; extend the exhale just enough to feel release; treat the exhale like closing a door on tension and accept the greater calm that follows.
Step 3 – Notice what passes: observe images in the mind, sounds in the background or smell in the air without chasing them; minds shift through states frequently – when thoughts pull you, label them and leave them, returning to the foot and breath.
Step 4 – Slow the transition: on the fourth step, slow movement further so motion almost pauses between lift and place; this brief stillness shows how attention can move from doing to meditating without losing balance.
Step 5 – Close and integrate: after the fifth step, stand still for 10–20 seconds; sense body alignment and breath; perhaps take three normal breaths, then continue the practice or gently walk away – practical option: repeat this five-step set three times when you need a powerful reset.
Phase 2 – Weight Transfer and Foot Contact
Place 60–70% of your weight onto the forward foot as it lands; aim for a heel-first contact that rolls to the ball over 0.4–0.6 seconds and maintain a steady flow. Match cadence to roughly 100±10 steps per minute and keep step length 40–60 cm on flat ground to reduce impact and keep the center of mass stable.
Direct attention inward by drawing awareness to the ankle, sole and calf so you can feel which part of the foot accepts weight first. If discomfort arises or you feel unhappy with alignment, shorten your stride by 10–20% and check shoe stiffness; anyone can test change quickly by walking 30 seconds barefoot on carpet to sense natural contact before resuming shoes.
Adjust technique for surface: across hard pavement increase cadence to lessen force, across soft ground or countryside paths lengthen steps slightly while keeping a gentle heel contact. Match footwear to the environment–choose low-profile shoes for sensory feedback or more cushioned shoes for repeated heavy impact–and select an appropriate cadence before raising speed.
This section and its heading treat the topic in clear terms: practice three 5-minute sets focused on the heel-to-toe roll, pause 10 seconds between sets to scan internal sensations, and record cadence and step length. If imbalance persists, consult a physiotherapist; theres no shame in modifying technique. With routine practice you will certainly improve the smoothness of weight transfer and clarity of foot contact.
 The Importance of Foreplay in Your Relationship – Boost Intimacy & Communication">
 Types of Casual Relationships – Guide to Casual Dating, Hookups & Friends with Benefits">
 Things to Consider Before Getting Remarried — Essential Tips">
 How to Set Boundaries with Friends Without Guilt | Tips">
 Take a Break from Work – How to Do It and Why You Need To">
 Overcoming Relationship Anxiety – From Stress to a Deeper Connection">
 Open Relationships – Rules, Boundaries & How to Make Them Work">
 How to Stay Mentally Strong During a Crisis – Practical Tips">
 Understanding and Managing Stress – A Comprehensive Guide">
 Mental Health Benefits of Making Your Bed — Boost Wellbeing">


